
fermented dill pickle recipe

The Best fermented dill pickle recipe
I love this recipe because it’s simple enough to whip up in a weekend but also worth the wait. It’s not just about the taste—it’s about the health perks too. Fermented foods are packed with probiotics, which help keep our gut happy and strong. And let’s be real, pickles are a great way to sneak in some veggies without anyone even realizing it. Whether you’re hosting a dinner party or just need a quick, crunchy bite to take with you, these pickles are always a hit. My family and I eat them daily, and I never get tired of the way they make everything taste better. Plus, they’re a great way to use up fresh dill and cucumbers before they go bad, so it’s a win-win for the kitchen and the fridge.
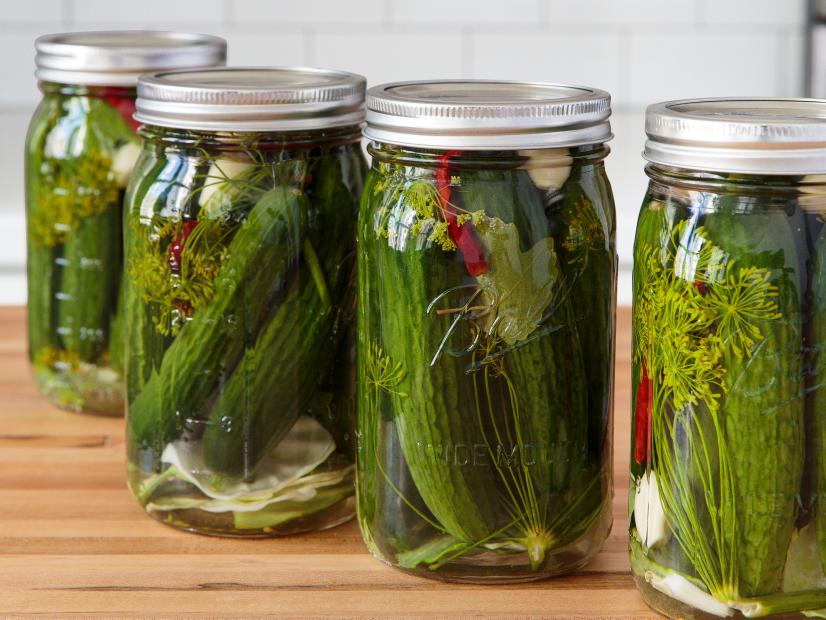
Fermented Dill Pickles
A tangy, probiotic-rich fermented pickle recipe using natural brine and fresh dill for a zesty, homemade flavor. Perfect for adding to sandwiches, salads, or enjoying as a snack.
🥘Ingredients
- 4 lbs green dill pickles (whole or sliced)
- 1 cup sea salt (non-iodized)
- 4 cups cold water
- 1 tbsp black peppercorns
- 1 tsp whole mustard seeds
- 1 tsp whole cloves
- 1 tsp whole coriander seeds
- 1 head fresh dill (or 2 tbsp dried dill)
- 1 tbsp garlic cloves (minced)
- 1 tbsp onion (sliced)
- 1 tbsp red pepper flakes (optional)
- 1 gallon cold water
- 1 cup sea salt (non-iodized)
- 1 tbsp black peppercorns
- 1 tsp whole mustard seeds
- 1 tsp whole cloves
- 1 tsp whole coriander seeds
- 1 tbsp garlic cloves (minced)
- 1 tbsp onion (sliced)
👨🍳Directions
-
1
Prepare the brine: In a large pot, combine 1 gallon of cold water, 1 cup sea salt, black peppercorns, mustard seeds, cloves, coriander seeds, minced garlic, and sliced onion. Bring to a boil, then reduce heat and simmer for 10 minutes. Cool completely before use. -
2
Pack the pickles: Rinse the dill pickles thoroughly under cold water to remove any salt or debris. Pack them tightly into the jar, leaving about 1 inch of headspace at the top. Sprinkle dill, peppercorns, mustard seeds, cloves, and coriander seeds over the pickles. -
3
Prepare the brine solution: Combine the cooled brine mixture with the remaining 4 cups of cold water in a separate container. Stir well. -
4
Fill the jar: Pour the brine solution over the packed pickles in the jar, ensuring they are fully submerged. Use a wooden spoon to gently press down the pickles to remove any air bubbles. Leave 1 inch of headspace. -
5
Cover and ferment: Cover the jar with a clean airlock lid or fermentation lid. Place the jar in a cool, dark place (around 65–75°F / 18–24°C). Ferment for 24–48 hours, checking daily to ensure the brine level remains above the pickles. -
6
Taste and adjust: After fermentation, taste a pickle to check for desired tanginess. If needed, add more brine or ferment for an additional 12–24 hours. Once to your liking, store the pickles in the refrigerator.
🔧Equipment
- Large clean jar (1-quart size)
- Clean airlock lid or fermentation lid
- Cheesecloth or fine mesh sieve
- Wooden spoon or spatula
- Measuring cups and spoons
- Thermometer (optional, for brine temperature)
📊Nutrition Facts (per serving)
📝Notes
Tips
- Use only non-iodized sea salt to avoid interfering with fermentation.
- Ensure the jar is clean and sanitized to prevent contamination.
- Fermentation times can vary based on temperature and personal preference.
- For extra flavor, add a few slices of fresh cucumber or a pinch of turmeric to the brine.
- Store pickles in the refrigerator once fermented to slow down fermentation and preserve freshness.
Storage: Fermented pickles keep well in the refrigerator for up to 3 months.
Variations
- Add a pinch of red pepper flakes or smoked paprika for a spicy kick.
- Use a mix of green and yellow dill pickles for a varied flavor profile.
Watch Video Of How Fermented Dill Pickles Works
❓ Frequently Asked Questions About Fermented Dill Pickles
How long does it take to ferment dill pickles in a brine solution?
Fermenting dill pickles typically takes about 4 to 12 days at room temperature (around 65–75°F / 18–24°C), depending on the recipe, brine strength, and your local humidity. For a faster fermentation, keep them in a cool, dark place (like a pantry or cellar). If you prefer a tangier flavor, you can ferment them for up to 2 weeks. Always check for proper acidity (pH below 4.6) before eating to ensure safety.
—
What’s the best way to prevent mold or bad bacteria from forming in my pickles?
To avoid mold or spoilage, follow these key steps:
1. Use sterile jars and utensils—rinse everything with hot water or boil for 5 minutes.
2. Make sure the brine covers the pickles completely—leave no air pockets (use a clean utensil to press down).
3. Start with a properly salty brine—use 1–2 tbsp kosher salt per quart of water (or follow a trusted recipe).
4. Ferment in a cool, dark place—heat speeds up fermentation but can promote mold; cold slows it down.
5. Check daily for signs of spoilage—cloudy brine, slimy texture, or off smells mean discard.
6. Add a pinch of pickling salt (non-iodized) to the brine—it enhances flavor and helps with preservation.
—
Can I use vinegar instead of fermenting dill pickles the traditional way?
Yes, you can quick-pickle dill pickles using vinegar instead of fermentation, but the flavor and texture will differ. A quick-pickle brine typically includes:
– 2 cups water
– ½ cup white vinegar (5% acidity)
– 2 tbsp sugar (optional, for sweetness)
– 2 tbsp kosher salt
– Fresh dill, garlic, and pickling spices (optional)
Cook the brine for 5 minutes, then let it cool before packing the pickles. They’ll be ready in 24 hours but won’t develop the same probiotic benefits as fermented pickles. If you want tangy but not fermented, this method works well for a fast result.
—
What’s the best type of dill to use for fermented pickles?
For the best flavor, use fresh, high-quality dill—French dill (Anethum graveolens) is the most common and flavorful choice. Avoid dried dill (it loses potency) unless you’re using it as a spice. For the best results:
– Pick young, tender stems (avoid woody or bitter varieties).
– Use both leaves and stems—the leaves add freshness, while the stems provide a slightly peppery bite.
– Wash the dill thoroughly before adding to prevent any dirt or pesticides.
– Optional: Add a few garlic cloves or red pepper flakes for extra depth.
—
Can I add other ingredients to my dill pickle brine to enhance flavor?
Absolutely! Many home cooks customize their pickles for extra flavor. Here are some popular additions:
– Herbs: Fresh cilantro, parsley, or lovage (for a milder, herbal taste).
– Spices: Black peppercorns, mustard seeds, or whole cloves (for warmth).
– Vegetables: Jalapeños, onions, or celery for texture.
– Extras: A pinch of turmeric (for color), bay leaves (for depth), or even a splash of apple cider vinegar (instead of white vinegar) for a softer tang.
– Sweetness: A little sugar or honey (though fermentation may still occur).
Tip: Avoid adding anything that could spoil the brine (like soft cheeses or raw meat) and always ensure the brine covers the pickles fully.
