
butterfinger cake recipe

The Best butterfinger cake recipe
What really sets this cake apart is how easy it is to customize. You can make it a regular cake, a sheet cake, or even a trifle with whipped cream and fresh berries. My husband always says it’s the only cake that tastes better the next day because the flavors meld together just right. And let’s not forget the kids—it’s their favorite, and they’ll beg for seconds if I let them. Plus, it’s got some hidden health perks. The Butterfinger pieces add a nice crunch, and the cake itself is made with whole wheat flour if you want to swap it out. It’s not some super low-calorie thing, but it’s not all bad either. It’s that kind of recipe where you can enjoy it without feeling like you’ve ruined your diet. And honestly, that’s what makes it special—it’s not about being perfect; it’s about enjoying something good.
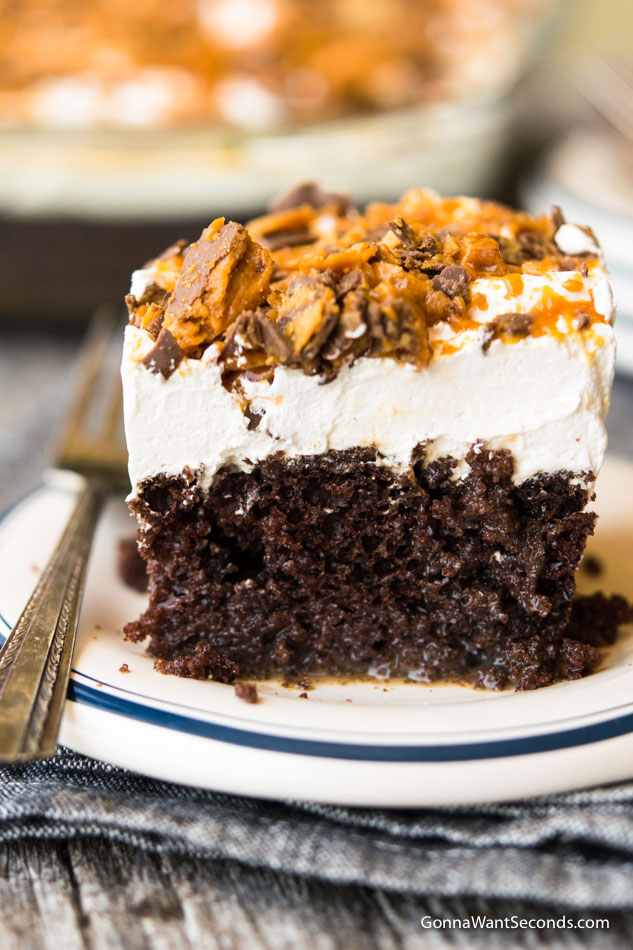
Classic Butterfinger Cake
A rich, moist cake infused with the iconic flavor of Butterfinger pieces, perfect for any occasion. The layers are soaked in a sweet caramelized sauce for an extra indulgent treat.
🥘Ingredients
- 3 ½ cups all-purpose flour
- 1 ½ cups granulated sugar
- 1 ½ cups unsalted butter, melted
- 4 large eggs
- 2 tsp vanilla extract
- 2 tsp baking powder
- 1 tsp baking soda
- 1 tsp salt
- 1 cup chopped Butterfinger pieces
- 1 cup unsalted butter
- 1 ½ cups granulated sugar
- 1 cup heavy cream
- 1 tsp vanilla extract
- ½ cup chopped Butterfinger pieces
👨🍳Directions
-
1
Preheat oven to 350°F (175°C). Grease and line two 9-inch round cake pans with parchment paper. -
2
In a large bowl, whisk together flour, sugar, baking powder, baking soda, salt, and ½ cup chopped Butterfinger pieces. Set aside. -
3
In another bowl, beat melted butter until smooth. Add eggs one at a time, then mix in vanilla extract. Gradually add dry ingredients to the wet, mixing until just combined. Fold in remaining Butterfinger pieces. -
4
Divide batter evenly between the prepared pans. Bake for 25–30 minutes, or until a toothpick inserted comes out clean. Allow cakes to cool in pans for 10 minutes, then transfer to a wire rack. -
5
While cakes cool, prepare the Butterfinger Caramel Sauce: In a saucepan, melt butter over medium heat. Stir in sugar until dissolved. Add heavy cream and vanilla, simmering for 3–5 minutes until thickened. Remove from heat, stir in chopped Butterfinger pieces, and let cool. -
6
Once cakes are completely cool, brush the tops with water and dip into the caramel sauce, letting excess drip off. Place cakes in a cake stand and chill for at least 2 hours before frosting. -
7
For the buttercream frosting, beat 2 cups softened butter with 4 cups powdered sugar, 2 tbsp vanilla extract, and 2–3 tbsp milk or heavy cream until smooth. Frost the cooled cake layers, decorating with extra Butterfinger pieces if desired.
🔧Equipment
- Mixing bowls (2 medium)
- Electric mixer or stand mixer
- Baking pans (9-inch round, two)
- Whisk
- Oven
- Spray bottle with water (for brushing)
- Piping bag or ziplock bag (for frosting)
📊Nutrition Facts (per serving)
📝Notes
- For a lighter version, reduce butter to 2 cups and use half the sugar in the sauce.
- Ensure Butterfinger pieces are finely chopped for a smoother texture in the cake.
- Store in an airtight container at room temperature for up to 3 days or refrigerate for up to 5 days.
Watch Video Of How Classic Butterfinger Cake Works
❓ Frequently Asked Questions About Butterfinger Cake
1. What is the best way to ensure the Butterfinger cake is moist and tender?
To achieve a moist and tender Butterfinger cake, use room-temperature butter (about 1 cup) and butterflies (chopped Butterfingers) mixed into the batter. Avoid overmixing the batter, as this can make the cake dense. Additionally, consider brushing the cake layers with a simple syrup (equal parts sugar and water, heated and cooled) after baking for extra moisture.
—
2. Can I substitute regular butter for a lower-fat version?
Yes! You can reduce fat slightly by using partially melted butter (about ¾ cup) mixed with 2 tbsp of melted coconut oil or vegetable shortening to maintain moisture. For a fully vegan option, replace butter with melted coconut oil (1 cup) and use a flax egg (1 tbsp ground flaxseed + 3 tbsp water) instead of eggs. Always follow the recipe adjustments carefully to avoid altering texture.
—
3. How do I prevent the Butterfinger cake from getting too crumbly or dry?
To avoid a crumbly or dry texture, don’t overbake—check doneness at 9–10 minutes less than the recipe suggests (use the toothpick test: it should come out with moist crumbs, not dry). Also, fold in the chopped Butterfingers gently (about 30–40 seconds) to avoid overworking the batter. For extra moisture, consider adding ½ cup of milk or evaporated milk to the batter if it’s too dry.
—
4. What’s the best way to store Butterfinger cake to keep it fresh longer?
Store the cake in an airtight container at room temperature for up to 3 days or refrigerate for up to 5 days. If freezing, wrap individual slices tightly in plastic wrap and aluminum foil to prevent drying. Reheat gently in the oven (350°F/175°C) for 5–10 minutes to restore softness.
—
5. Can I make a gluten-free version of the Butterfinger cake?
Yes! Replace all-purpose flour with a 1:1 gluten-free baking blend (like Bob’s Red Mill or King Arthur). For best results, use 1 cup gluten-free flour + 1 tbsp cornstarch to mimic the texture. Ensure your mix-ins (like Butterfingers) are also gluten-free. Since gluten-free baked goods can be denser, slightly underbake (check at 9–10 minutes less than the recipe) and brush with simple syrup after baking for extra moisture.


