
crusty italian bread recipe

The Best crusty italian bread recipe
What I love most about this bread is how it’s a perfect balance of indulgent and wholesome. It’s not just bread—it’s a way to eat real food without overcomplicating things. The whole grain and seeds give it a good dose of fiber, keeping me full longer than store-bought loaves, and the olive oil and herbs add flavor without any unnecessary additives. My family doesn’t just eat this bread for breakfast or snacks; we use it for everything—sandwiches, toast with avocado, even as a side to soups or stews. It’s that kind of bread that makes meals feel complete, like you’re doing something good for yourself and your family. And honestly? The health benefits aren’t just a bonus—they’re why I stick with it. No refined flour, no junk, just good, simple ingredients that make you feel better, both inside and out. Plus, there’s nothing like the satisfaction of pulling a perfectly baked loaf from the oven, knowing you’ve made something that’s as nourishing as it is delicious.
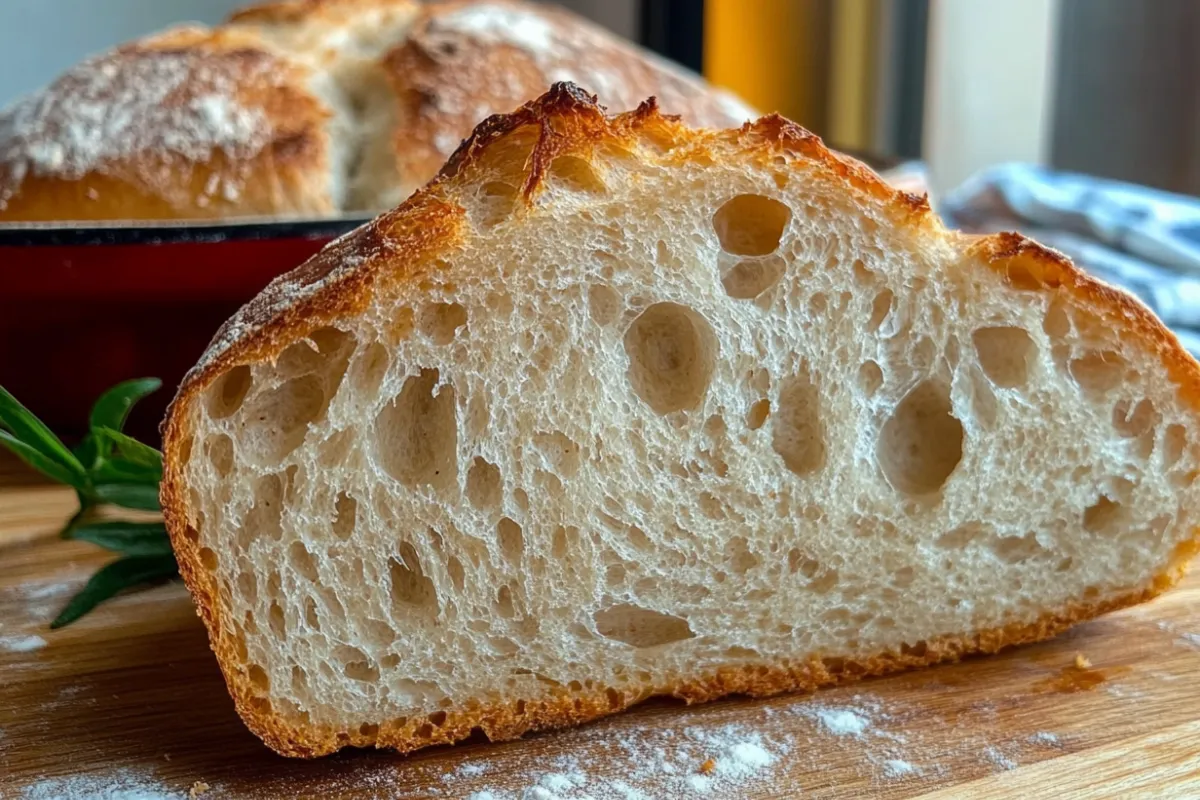
Crusty Italian Bread
A simple, rustic Italian bread with a crispy crust and soft interior, perfect for sandwiches or dipping in olive oil. This recipe is a must-try for any occasion.
🥘Ingredients
- 3 cups (360g) bread flour
- 1 ½ tsp salt
- 1 packet (7g) active dry yeast
- 1 ½ cups (360ml) warm water (~110°F)
- 2 tbsp olive oil
- 1 tbsp whole wheat flour
- 1 tbsp sesame seeds
- 1 tbsp poppy seeds
👨🍳Directions
-
1
In a large mixing bowl, dissolve yeast in warm water. Let sit for 5 minutes until foamy. -
2
Add flour, salt, and olive oil to the yeast mixture. Mix until a shaggy dough forms. -
3
Knead the dough on a lightly floured surface for 8-10 minutes, or use a stand mixer with a dough hook for 5-7 minutes, until smooth and elastic. -
4
Place dough in a lightly oiled bowl, cover with a damp towel, and let rise in a warm place for 1-2 hours, or until doubled in size. -
5
Preheat oven to 425°F (220°C). On a floured surface, divide the dough into 12 equal pieces. Roll each into a ball, then flatten slightly. -
6
Roll each ball into a 6-inch (15cm) oval shape. Place on a baking sheet, lightly brush with olive oil, and sprinkle with seeded flour mixture. -
7
Let the bread rise for another 30-45 minutes until puffed and slightly domed. -
8
Bake at 425°F (220°C) for 20-25 minutes until golden brown and crispy.
🔧Equipment
- Mixing bowl
- Stand mixer or kitchen aid
- Dough scraper
- Clean kitchen towel or baking mat
- Baking sheet
- Oven
📊Nutrition Facts (per serving)
📝Notes
- For extra crustiness, bake the bread on a preheated baking sheet for 5 minutes before placing in the oven.
- Store in an airtight container for up to 3 days or freeze for longer storage.
- Substitute whole wheat flour for a healthier option, but expect a slightly denser texture.
- Add a pinch of sugar to the yeast mixture to enhance flavor.
Watch Video Of How Crusty Italian Bread Works
❓ Frequently Asked Questions About Crusty Italian Bread
What is the key difference between this crusty Italian bread recipe and store-bought baguettes?
The crusty Italian bread in this recipe is crafted with a higher hydration level (around 70-75%) and a longer fermentation time, which allows the gluten to develop fully and creates a more open, airy crumb with a thicker, crispy crust. Store-bought baguettes often use lower hydration and shorter fermentation, resulting in a denser interior and a more delicate crust. Additionally, this recipe includes whole wheat flour for added texture and flavor, whereas many commercial baguettes use refined white flour.
Why does the dough need to be cold before baking?
Cold dough slows down the yeast activity, allowing for a more controlled fermentation process. This helps develop stronger gluten and improves the bread’s structure. Baking the dough at room temperature can lead to uneven baking, a weaker crust, or a dough that doesn’t hold its shape properly. The cold rest also helps prevent the yeast from overworking, which can cause the bread to collapse.
Can I use a stand mixer instead of doing the dough by hand?
Yes, you can use a stand mixer with a dough hook attachment, but the technique is slightly different. Start on low speed (speed 1-2) and knead gently for about 5-7 minutes to incorporate the flour and develop the gluten. Increase speed to medium (around 6-7) and knead for another 5-7 minutes until the dough is smooth and elastic. Avoid overmixing, as this can lead to a tough texture. If using a mixer, let the dough rest at room temperature for about 10-15 minutes before shaping to help it relax.
What can I do if my dough is too sticky to handle?
If your dough is too sticky, it may need more time to rest or hydration. Try these steps:
– Let the dough rest for an additional 15-20 minutes at room temperature before shaping.
– If it’s still too sticky, add 1-2 tablespoons of ice water (not hot) and knead gently until it reaches the right consistency.
– Ensure you’re using a clean, floured surface when handling the dough—any residual flour can make it stickier.
– If the dough is very wet, it might benefit from a longer fermentation period to absorb excess moisture.
How do I achieve the perfect crust for this bread?
The crust’s crispiness comes from two key factors:
1. Baking Temperature & Time: Preheat your oven to 475°F (245°C) with a Dutch oven or a heavy baking stone inside. Bake for 25-30 minutes with the lid on (for a steam bath), then remove the lid and bake for another 10-15 minutes until deeply golden. For a thinner crust, reduce the final baking time slightly.
2. Cold Proofing: Cold proofing the dough (refrigerating it overnight) helps create a thicker, denser crust due to better gluten development and slower yeast activity.
3. Scoring: Use a sharp knife or razor to make a deep cut (about ½ inch deep) before baking to allow steam to escape and create a crispy exterior.
4. Steam: The steam from the Dutch oven or baking stone is crucial for a well-defined crust—don’t skip this step! If you don’t have a Dutch oven, place a tray of boiling water in the oven during the first phase of baking.

